Eclipse is a very popular IDE among developers because of its vast features and ease of use. Before getting into basics of Eclipse we will see how to download Eclipse and create workspace in Eclipse.
What is an IDE?
IDE is short for Integrated Development Environment. An IDE consolidates operations such as coding, debugging, running, view output etc in a single place.
What is a Workspace?
A workspace is just a folder where all the projects and programs are kept. We need to specify to IDE where is our workspace. So whenever we create any project in IDE then that project will be kept in the workspace.
At the time of writing this tutorial the latest version of Eclipse is 2020-03.
Steps to Download Eclipse and create workspace :
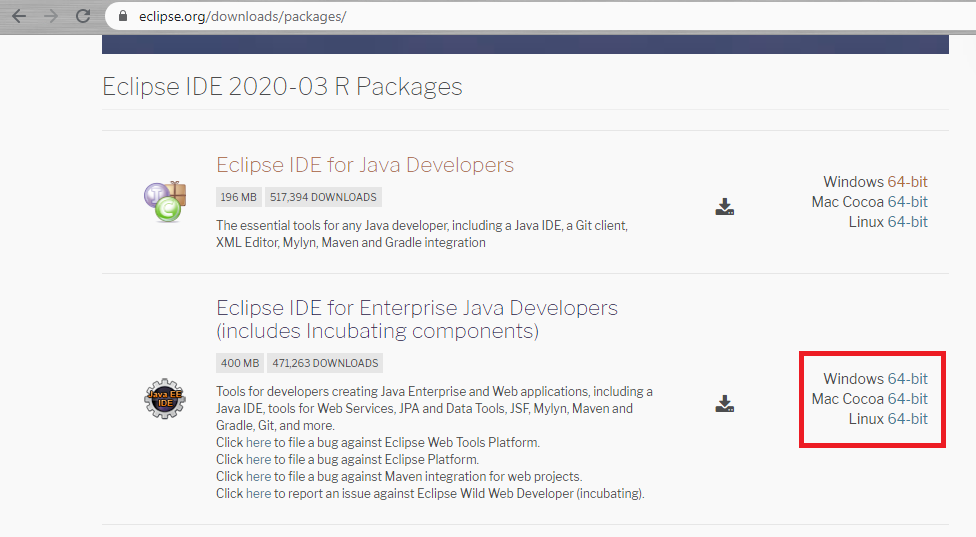
Step 1 : To download eclipse go to https://www.eclipse.org/downloads/packages/. On this page you may download “Eclipse IDE for Java developers” if you do not want to create web projects otherwise you should go with “Eclipse IDE for Enterprise Java developers”. We would suggest go with Enterprise Java version since it will enable you to create both simple java applications as well as web applications.
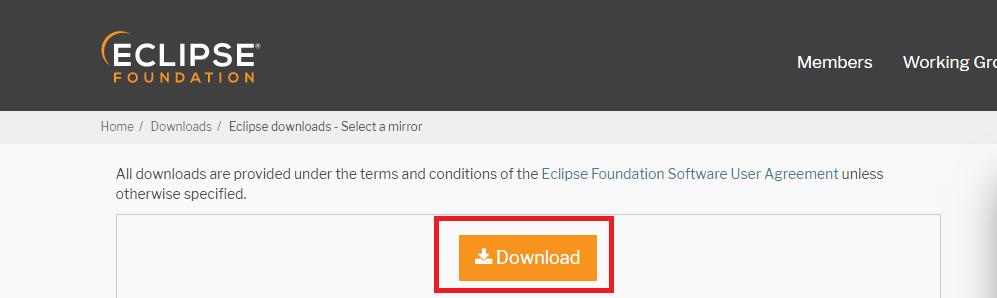
Step 2 : Now on next page click on the Download button and then select the folder where you want to keep your Eclipse in the system.
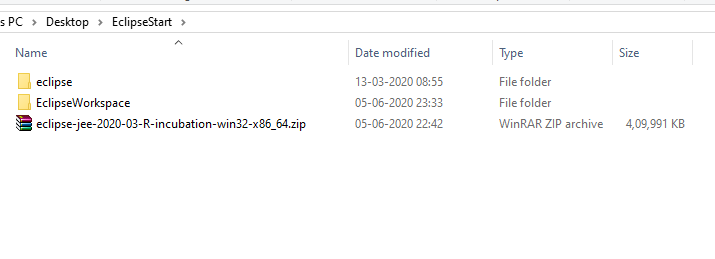
Step 3 : Now extract the downloaded zip file.
Step 4 : Create a new folder(workspace folder) where all your projects will be kept. We will keep the workspace folder in the same folder where we extracted the eclipse although you can keep it anywhere on the system. Let us name the folder as ‘EclipseWorkspace’.
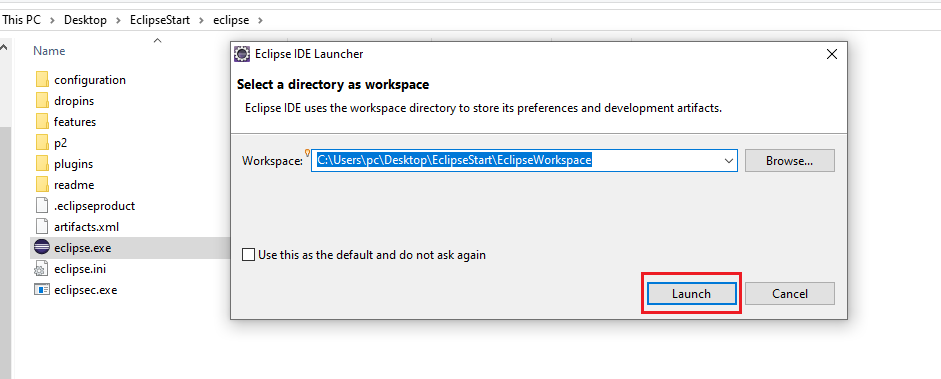
Step 5 : Now open the extracted folder and open ‘eclipse.exe’ file. It will prompt you to select workspace folder. Now select the workspace folder which was created in previous step and click Launch.
Step 6 : Eclipse will be opened successfully.

You have successfully downloaded Eclipse and created workspace.
Let us now Create and Run a program in Eclipse.