Refresh rate of a computer is the rate at which the screen’s frame/display is being refreshed. Higher the refresh rate better will be screen display. If the refresh rate is reduced then you may notice screen to flicker.
Refresh rate may have values such as 60 Hz, 40 Hz, 144 Hz etc. This ‘Hz’ unit specifies frequency. It means the number of times screen display is being refreshed per second.
Here are the steps to change Refresh rate in Windows 10 :-
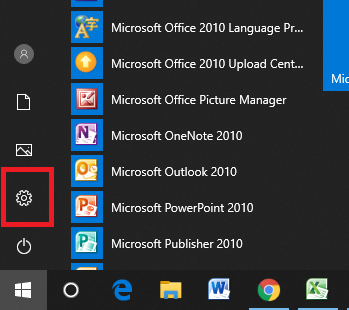
Step 1: Go to Settings from the Start button.
Step 2 : A new window will be opened. Select ‘System’ in it.
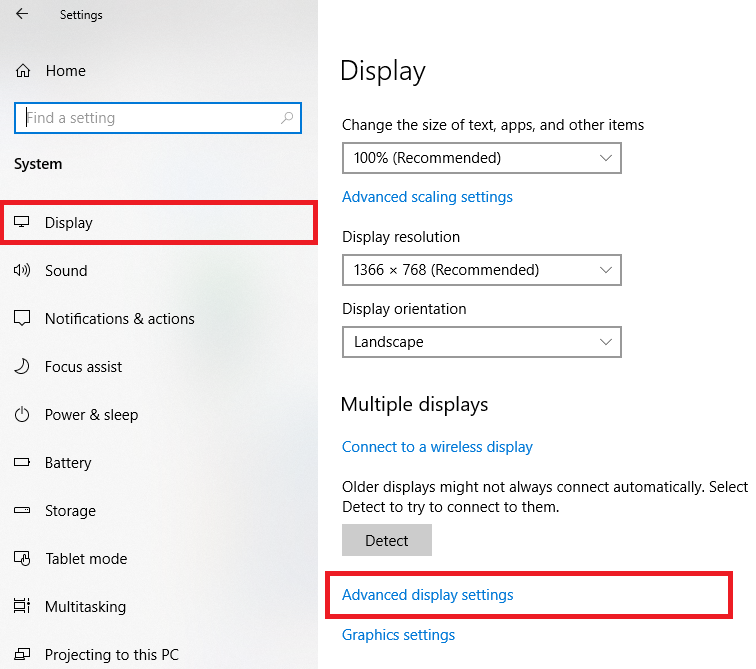
Step 3 : Choose ‘Display’ menu from the menu list on the left side.
Step 4 : Choose ‘Advanced Display Settings’ by scrolling to bottom of screen on right side.
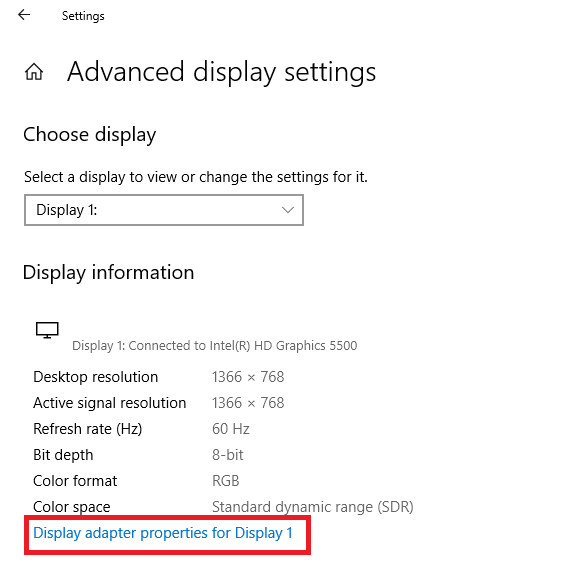
Step 5 : A new window will appear. Select ‘Display adapter properties for Display 1’.
Step 6 : A new dialog box will appear. Choose ‘Monitor’ tab on top of it. Now you can change refresh rate from drop down under ‘Screen refresh rate’.
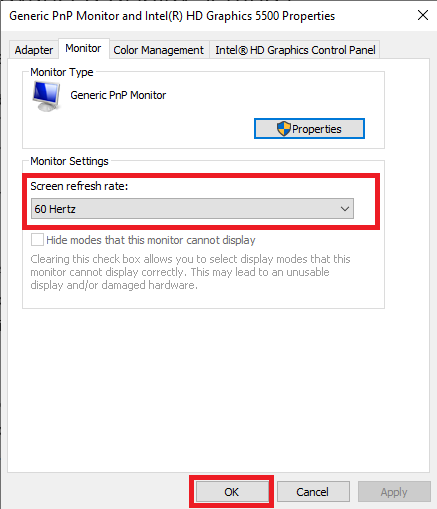
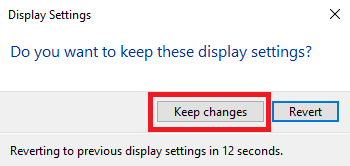
Step 7 : Now click OK button. A dialog box will appear. Select ‘Keep Changes’ button on it.
You successfully changed Refresh rate of Windows 10. Now your screen will refresh at the new specified Refresh rate.